
Last week I went over some work that should be preventative in most cases. This week I’ll show you why buying cheap parts is a bad idea when you’re trying to improve reliability. I bought a MotoRad thermostat for the Mazda, and 4 months later I was back on Amazon adding an OEM one to my cart instead, here’s why.
A week or so after replacing the water pump and thermostat, I noticed my coolant tank was a little low. It wasn’t an alarming amount, so I figured that maybe the system hadn’t been fully bled of air and the drop was due to more coolant making it’s way into the system. I topped it off and went about my day. A week or two later I noticed the same thing. I topped it off again and started to worry that maybe I’d messed up the water pump gasket when I’d installed the new one.
Another week goes by and I’m working under the car when I notice a damp green stain on the underside. Up top to check the coolant tank and wouldn’t you know, it’s a bit low again. This finally spurred me into taking the initiative and I started to dig into the problem. I dug around in the engine bay a bit and found that the thermostat was leaking around the top and running down. Not enough for me to be super worried but enough that I started looking around for the best price on a new one.

A week or so after that I got a CEL for “engine not warming up to operating temperature in a certain period of time”, or something along those lines. So I decided it was time to do the work again and get it done with. I bought an OEM piece from Amazon and got to work.

I removed the hoses again, and this time I opted to replace them with normal hose clamps as they are a lot easier to work with in the limited space.

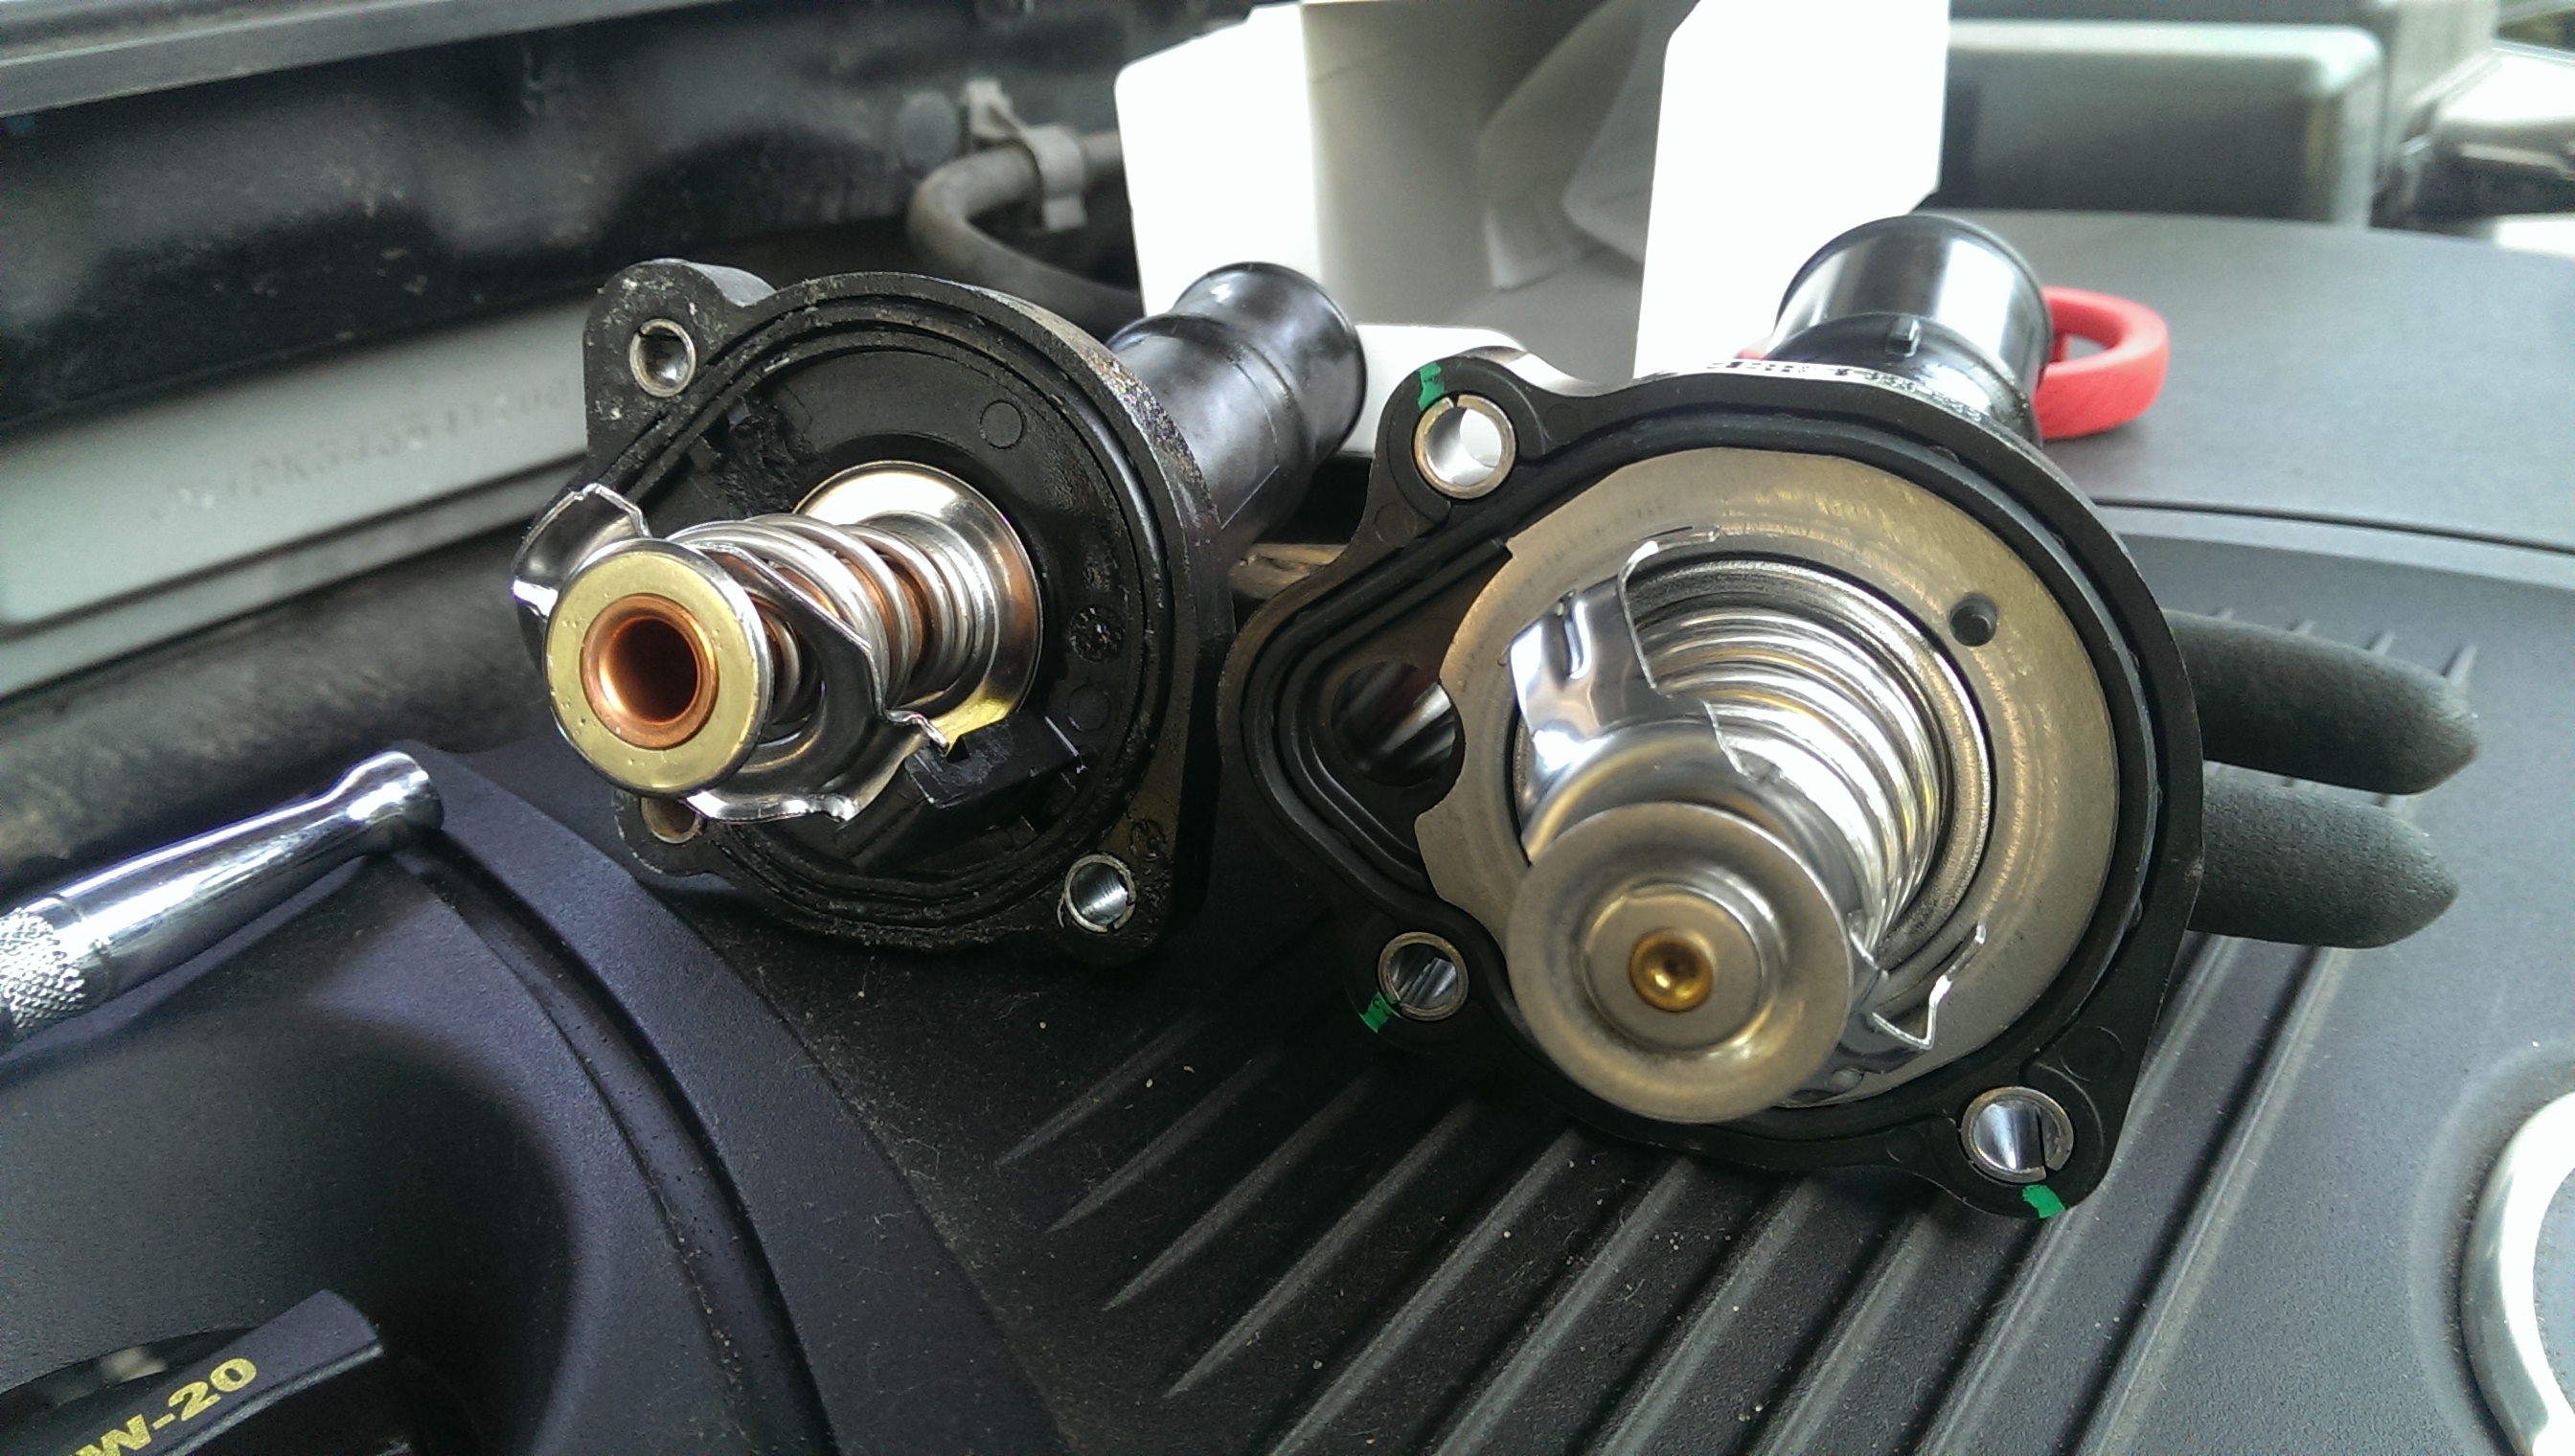
Once I had the old thermostat removed it was easy to see there were a few issues. One of the plastic tabs used to keep pressure on the thermostat had broken off. Luckily the tab hadn’t been sucked into the water pump since it was too big, otherwise it could have caused all sorts of havoc. I found it sitting just inside the pump inlet and thanked whatever gods were listening. Additionally, the thermostat seal was leaking in multiple places, including some of the bolt holes. In the short time it was on there the metal inserts had even begun to rust.


The OEM thermostat has a much sturdier metal design and a base plate that is much better at holding the thermostat closed and releasing reliably. Take a look at the comparison shots below to see how much better the OEM part is put together. It’s more expensive sure, but the OEM piece is worth the investment, especially on a part you shouldn’t need to replace often.


I cleaned up the bolts a little as they had begun to get rusty. Once that was done I put everything back together again. This time everything went much smoother since I had less to take apart and I had already figured out the best way to wedge my hand in the limited space. All in all it probably took 45 minutes from start to finish, with a bit of “wow that part got messed up” thrown in.

That’s all for this week! I may have some programming stuff next week, I’m working on porting a little script from VBS to PowerShell (seemed like a good idea at the time) so with any luck that will be finished soon. If not, I’ll completely neglect to mention it next week!