
The weather was beautiful this weekend! Well Saturday was at least, good enough that I got a tiny bit of work in on the Laser. I’m not going to go over what I did in this post, I’ll save it for something more substantial. This week I’m going over the time I replaced the drivers side wheel hub on my Mazda 3. If you happen to be paying attention, you too can change said wheel hub. Well not on my Mazda, but on your own, or pretty much any other vehicle as most setups will be similar.
You’ve already seen some of my other posts about how I was chasing down a vibration in the front end of the Mazda. It was in this interest that I decided my old drivers side wheel hub had to go. Getting the hub off the car is a pretty simple procedure, you just have to unbolt a lot of stuff, but changing the wheel hub itself will require you to get a bit creative. Lets jump in!


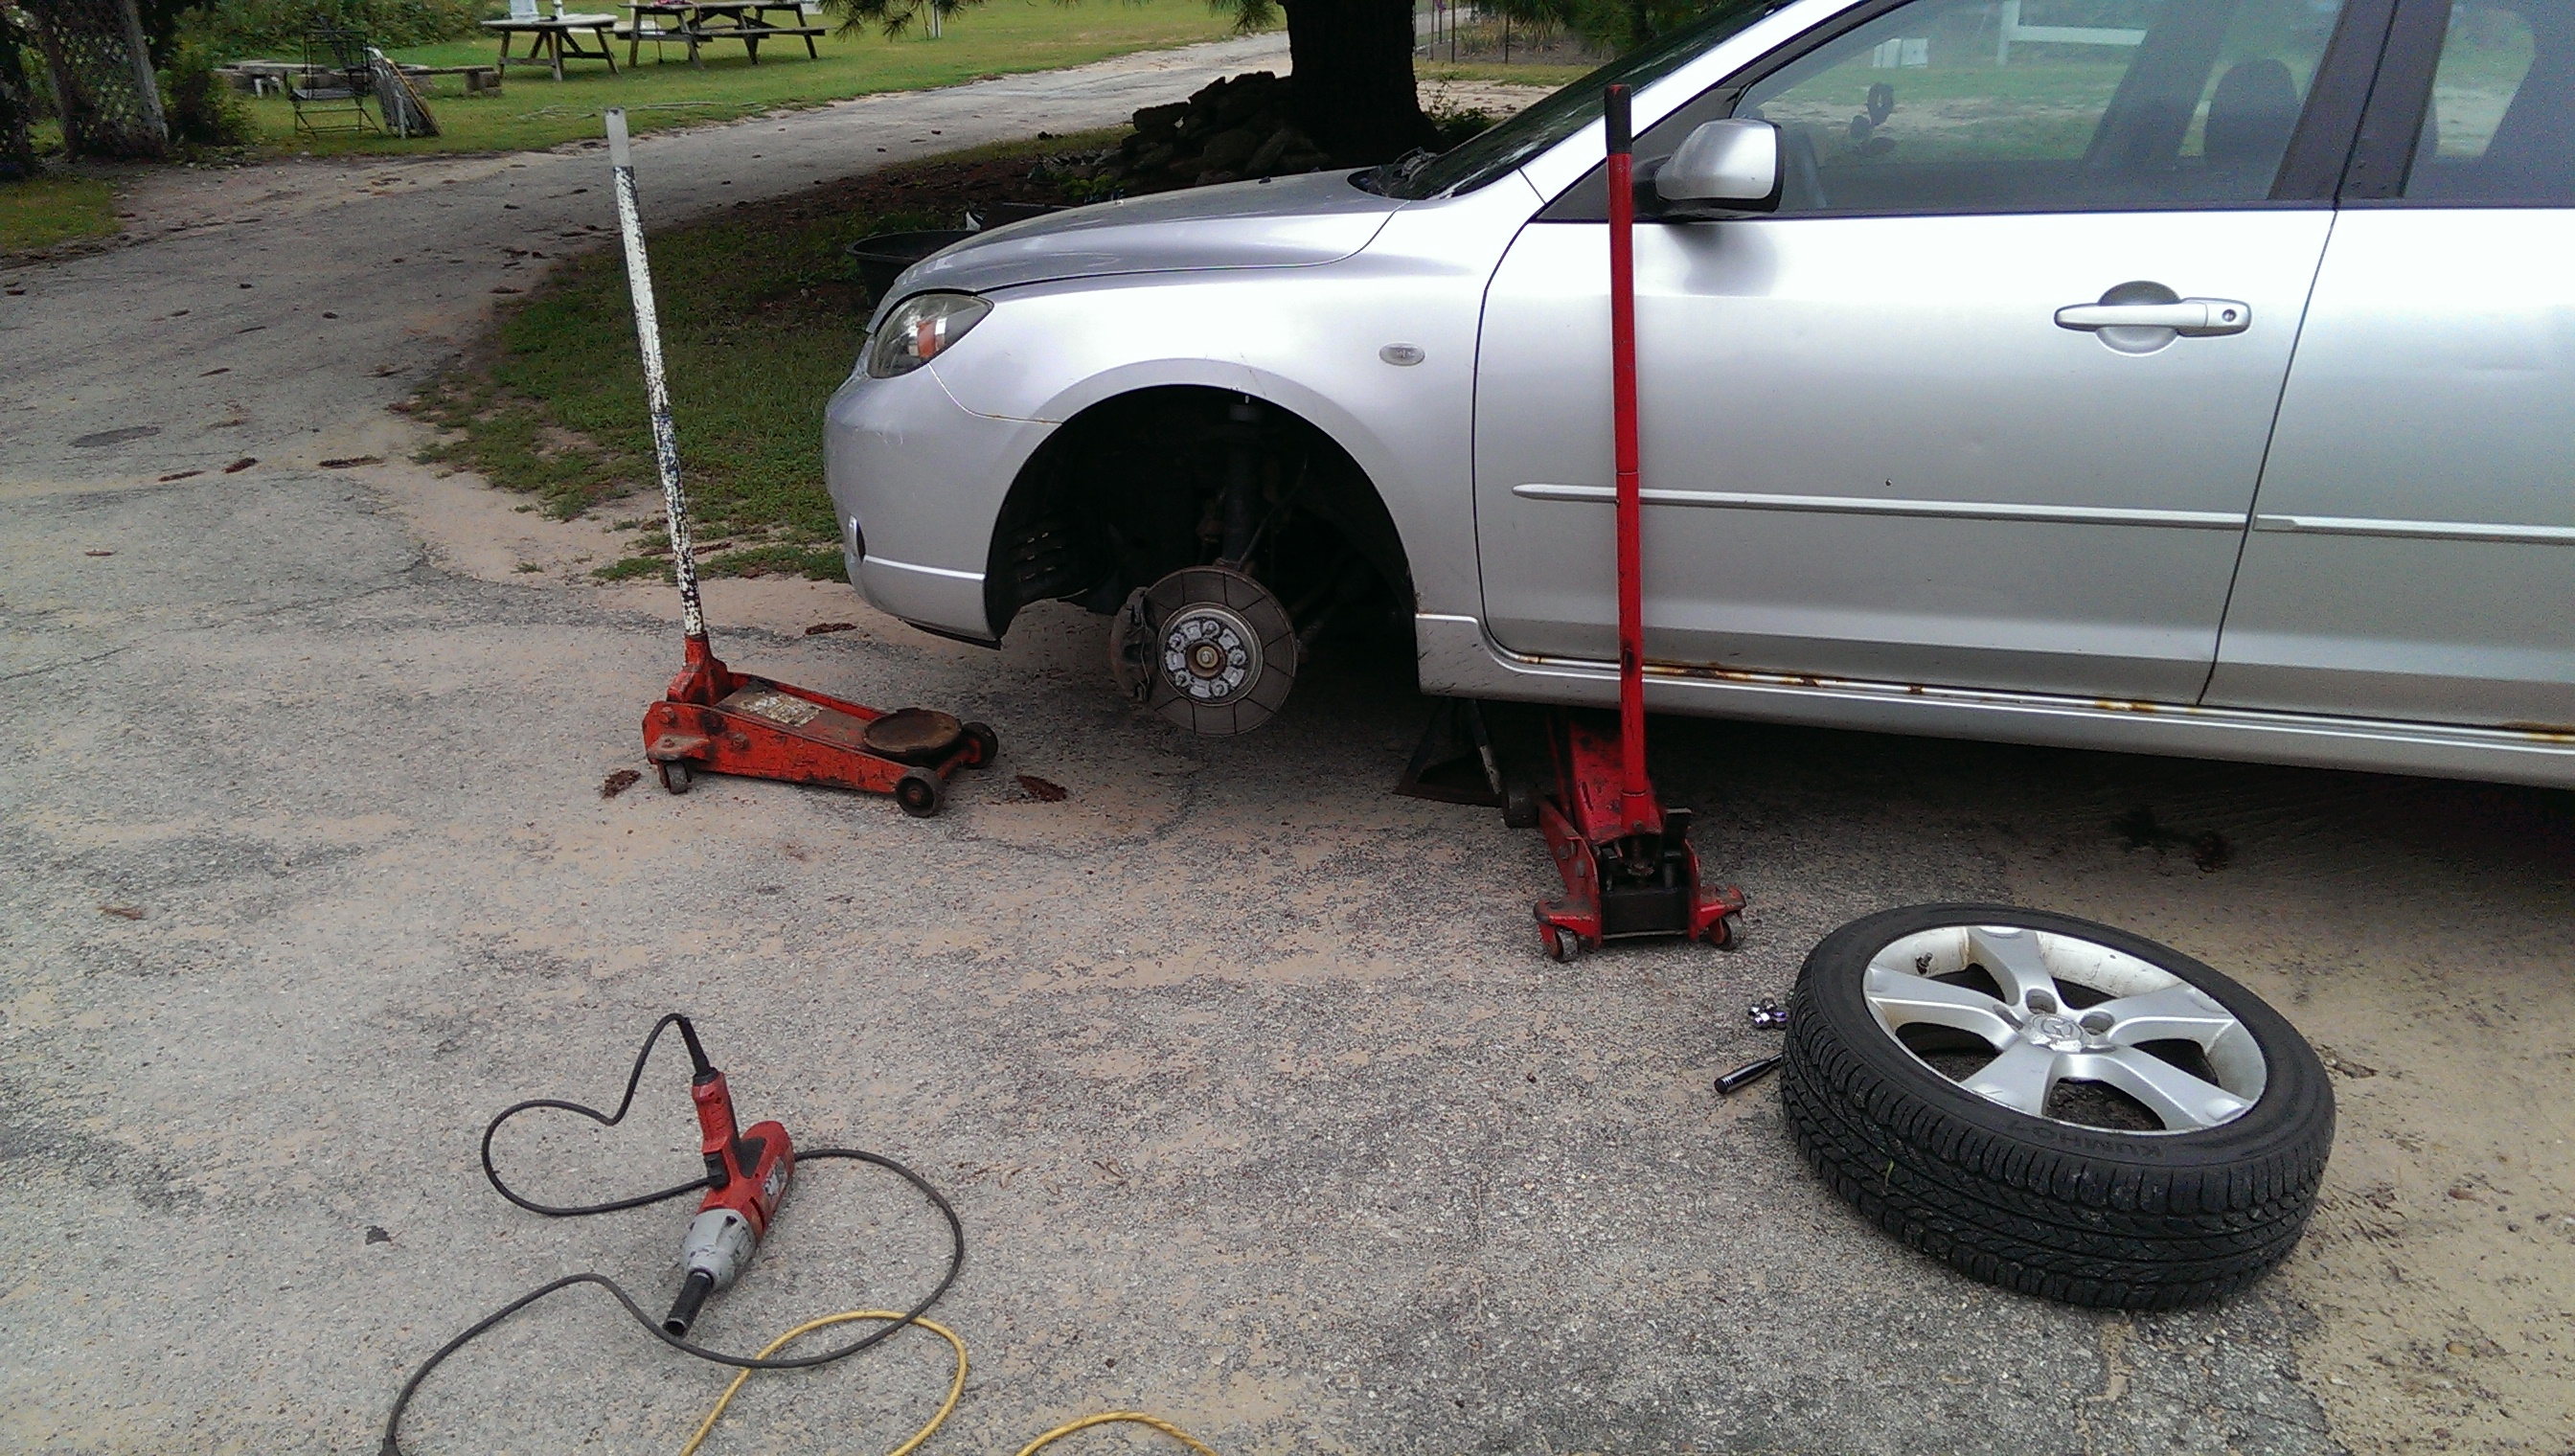
You’ll need to take the wheel off, remove the caliper & rotor, disconnect the outer tie rod end, and then remove the shock bolt and axle lock bolt. Make sure to unhook the ABS wheel sensor before getting rough with the hub. With everything else disconnected, there should only be one 14mm bolt on the bottom of the wheel hub for the ball joint. You’ll need to loosen the shock so you can remove it from the knuckle as well.


That’s half the fun! Maybe less. Now you need to get the old wheel bearing and hub out of the steering knuckle. As a side note, if you see this grease splatter pattern then you need to replace you half shaft. Seeing this I realized I probably didn’t need to replace my wheel hub.


Removing the wheel hub from the steering knuckle isn’t too hard, just smash it with a hammer until it falls out of the knuckle and avoid hitting the other side of the ABS sensor. In our case, we smashed some of the knuckle a bit so we went ahead and smoothed that out before putting the new bearing in.


The new bearing doesn’t go back in as easily, if you’ve got access to a bearing press or can get them pressed in for cheap then I’d go that route. We ended up using a wood block to distribute force and then we smashed that with a hammer as well. The small hammer could only get us so far though, so we broke out the mallet and took turns. We also moved the wood block around a little to try and wiggle the hub into place just right.


Once you’ve got the new wheel hub/bearing in place then you just have to throw it back on the car, easy! I started by getting the shock into place, then the half shaft, and then the ball joint. Those are the major ones you need to get lined up, then you need to re-attach the tie rod end and brake components and you’re good. The ball joint can be tricky to press back into the knuckle, I’ve found it easiest to use a jack as a means to press upward on the ball joint.


Don’t forget to use Loctite on the axle lock bolt. This one didn’t seal up properly due to grease in the threads. I cleaned it as best I could and put it back together, but it still didn’t seal. In my case it really didn’t make a difference since the half shaft was already done for.


There you have it! One brand new wheel hub. I inspected my old wheel hub and was pleased to find that it had been getting to the end of it’s life, I should probably replace the other side as well. The hub I got was $40 on Amazon, and it only took me about 2 hours to complete the work. Not bad all things considered.
Spring is getting closer, and I’m very ready to get back to my Laser. You’ll see it here when I do, until next time!