
I’ve been in my new role for almost a year now, and I’ve learned a ton! As I previously alluded to, I really enjoy the work I’m doing currently and I also get to do things that are a first for my team/company. So today, I thought I’d share one of the cooler things I got working recently. Also, we got to see Glass Animals a second time for their Dreamland tour and it was amazing. I’m still a bit obsessed with the Dreamland album, so go listen to that.
This particular project wasn’t a first on its own, I was lucky to have two other projects I could reference to get the basics worked out. However, it is the first project we’ve had at Aarons that leverages both Bitbucket runners and Ansible in order to create a compact and secure process for running Ansible playbooks.
Bitbucket Runners & Pipelines
Part of why I wanted to brag talk about this project is because it’s seemingly a bit difficult to find information on this topic, specifically if you need to work with repo variables in your pipeline. In fairness, the documentation on Runners is pretty good and will get you very close, depending on your usage. Something to note: both Bitbucket Pipelines and Bitbucket Runners have an associated cost depending on runtime minutes so while you can try this on your own, you’ll need to stay within the free threshold.
At Aarons, we primarily use Bitbucket as our code repository. We also regularly use the Bitbucket pipelines function to package code and push that code off into registries. Additionally, we use the pipelines function to call the Octopus API in order to create deployments for the matching project and complete the CI/CD workflow.
What if you want to skip using a separate CD tool? What if your CD tool doesn’t have a great way to handle secrets? This is where Bitbucket Runners come in. These runners are essentially a deployment box that you host and that you can use to run builds within your pipeline on your own infrastructure. Much like normal cloud pipeline builds, these on-prem runner builds leverage containers.
Again, I was lucky that we already had some on-prem runners setup and two projects were already using runners in a POC manner, so I was able to piggyback off that work. What really stumped me was using runners in conjunction with repository variables in a way that would replace variables in code. There’s no function in Bitbucket to substitute repo variables into your code unless all of your code is running directly in the pipeline file.
The Use Case
I was attempting to setup a process that would allow me to create new users on hosts in an Ansible inventory file and then add those users into the sudoers group on those same machines. To do so, I created two Ansible playbooks, so that they could be called separately if needed. One playbook simply creates the users and the other adds those users into a group. These are super simple playbooks, but they also leverage secrets such as passwords, and you never want to commit those to your repo. Enter: repo variables.
In our normal process we would; put variables in our code -> package that code -> push to Octopus -> tell Octopus to deploy the code & to substitute the variables in code for variables defined in the Octopus project. This works, but there is more complexity here, and some security concerns as well. Those substituted vars are going to land on your deployment box in plain text unless you have a process to vault them, which introduces more complexity. So, the question becomes: is there a more elegant solution?
Variables and Runners
Since your pipeline build is just going to be running a container, you can write up a script in whichever language applies (powershell or bash, depending on your container OS) that will look at your repo, find variables you define, and replace those with variables you’ve added to your Bitbucket repo. This keeps everything nice and tidy. Your pipeline runs on-prem, your variables aren’t exposed in code, and they also land on ephemeral containers that are destroyed at the end of the build. You will still need to consider your output/logging as that is captured for each build. Make sure that’s not exposing your secrets and you’ve got a tidy little setup!
This solves some of the security concerns we had above, and reduces complexity as well by removing a service/platform that may have its own outages. In addition, should Bitbucket cloud pipelines have an outage (looking at you AWS), you now have a means to continue running your builds.
How It Works
Alright, enough teasing! Let’s look at an example bitbucket-pipelines.yml. Sidenote: You can use all the code in that repo, but you’ll need the requisite vars setup plus an on-prem runner tagged with ansible.
In this example, I’m running my pipeline on an alpine linux container which is then calling our on-prem runner (via a tag) and telling that to run an ansible-runner container that Redhat graciously provides.
Below those setup sections you’ll find the script section. You can see I’m simply utilizing the sed command to find the variables I placed in my code (using the #Variable pattern) and replacing those with repo variables I’ve defined in my Bitbucket repo ($RepoVar) in a given file.
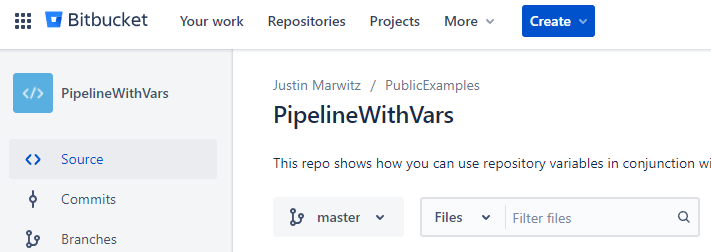
If you want a better understanding of what I’m doing here, take a look at my repo and how it’s laid out for more context.
image: octopusdeploy/octo:latest:alpine
pipelines:
  branches:
    master:
      - step:
          name: Ansible Runner
          deployment: Test
          runs-on:
            - "self-hosted"
            - "ansible"
          image: quay.io/ansible/ansible-runner:latest
          script:
            - sed -i 's/#HOST1/'"${HOST1}"'/g' ./hosts.yml
            - sed -i 's/#USER1/'"${USER1}"'/g' ./create_user/main.yml
            - sed -i 's/#PASS1/'"${PASS1}"'/g' ./update_sudo/main.yml
            - sed -i 's/#USER1/'"${USER1}"'/g' ./update_sudo/main.yml
            - sed -i 's/#GROUP/'"${GROUP}"'/g' ./update_sudo/main.yml
            - ansible-playbook ./create_user/main.yml -i ./hosts.yml
            - ansible-playbook ./update_sudo/main.yml -i ./hosts.yml
options:
  docker: true
It’s really quite simple, but it took me longer than necessary to figure out the quotation and bracket setup to get this working. I’m used to simply referencing Bitbucket variables, with $RepoVar, or using the Octopus substitution pattern, #{Var}, for this kind of work.
There are certainly improvements to be made: I could create my own container, with Ansible installed, to run my code against as that would increase security slightly. In my actual code I’m exporting the Ansible_Host_Key_Checking option as I didn’t have a good way to handle SSH key checking, which can in theory reduce security as well. On that subject, I have since adopted a playbook I found around the interwebs. That process is also not ideal, as it’s asking each host for an ssh key and just stashing it without proper validation which again, could introduce an opportunity for man in the middle attacks. Regardless, this took me a good amount of time to figure out and I’m really happy that I got it working!
Gotchas
One thing you absolutely need to keep in mind is that all these vars will be landing in plain text unless you have a vaulting mechanism setup. Bitbucket will not expose repo variables that you have marked as private, but if you are grabbing those with sed and placing them in code, that protection goes away. This means you need to be careful about how you log your playbook results or you’ll be exposing passwords and the like in your build logs.
For my process, that meant adding a simple Ansible flag to my create_user playbook. Just toss in “no_log: true” and you won’t have the standard output from the playbook, which would reveal the username as well as password. This way you still see success/failure but in a more security-minded manner.
Other gotchas on this are more specific to using sed, it’s just a bit picky about the syntax and options you use. Luckily that also means it’s much more flexible than my example and can do a ton of cool stuff that I just don’t need it to do. Should you need to do some more complex work with variables in Bitbucket Pipelines, I’ll have another post about it soon!