
One trip down, and one incoming! We’ve returned from Minneapolis, where we celebrated out ten year anniversary, and we really enjoyed our time there. More relevant though, I did a bit of work on the Mazda before we headed up. Among those last minute repairs; a transmission mount, drivers side half-shaft, drivers side control arm, and some usual maintenance like the air filter and an oil & filter change.
It turns out the transmission mount didn’t need to be changed out, but after seeing the state my passenger motor mount was in I’m just not taking chances with the others. At worst I’ve learned a bit more about the car, and I’m all for being proactive. Let’s jump in shall we?
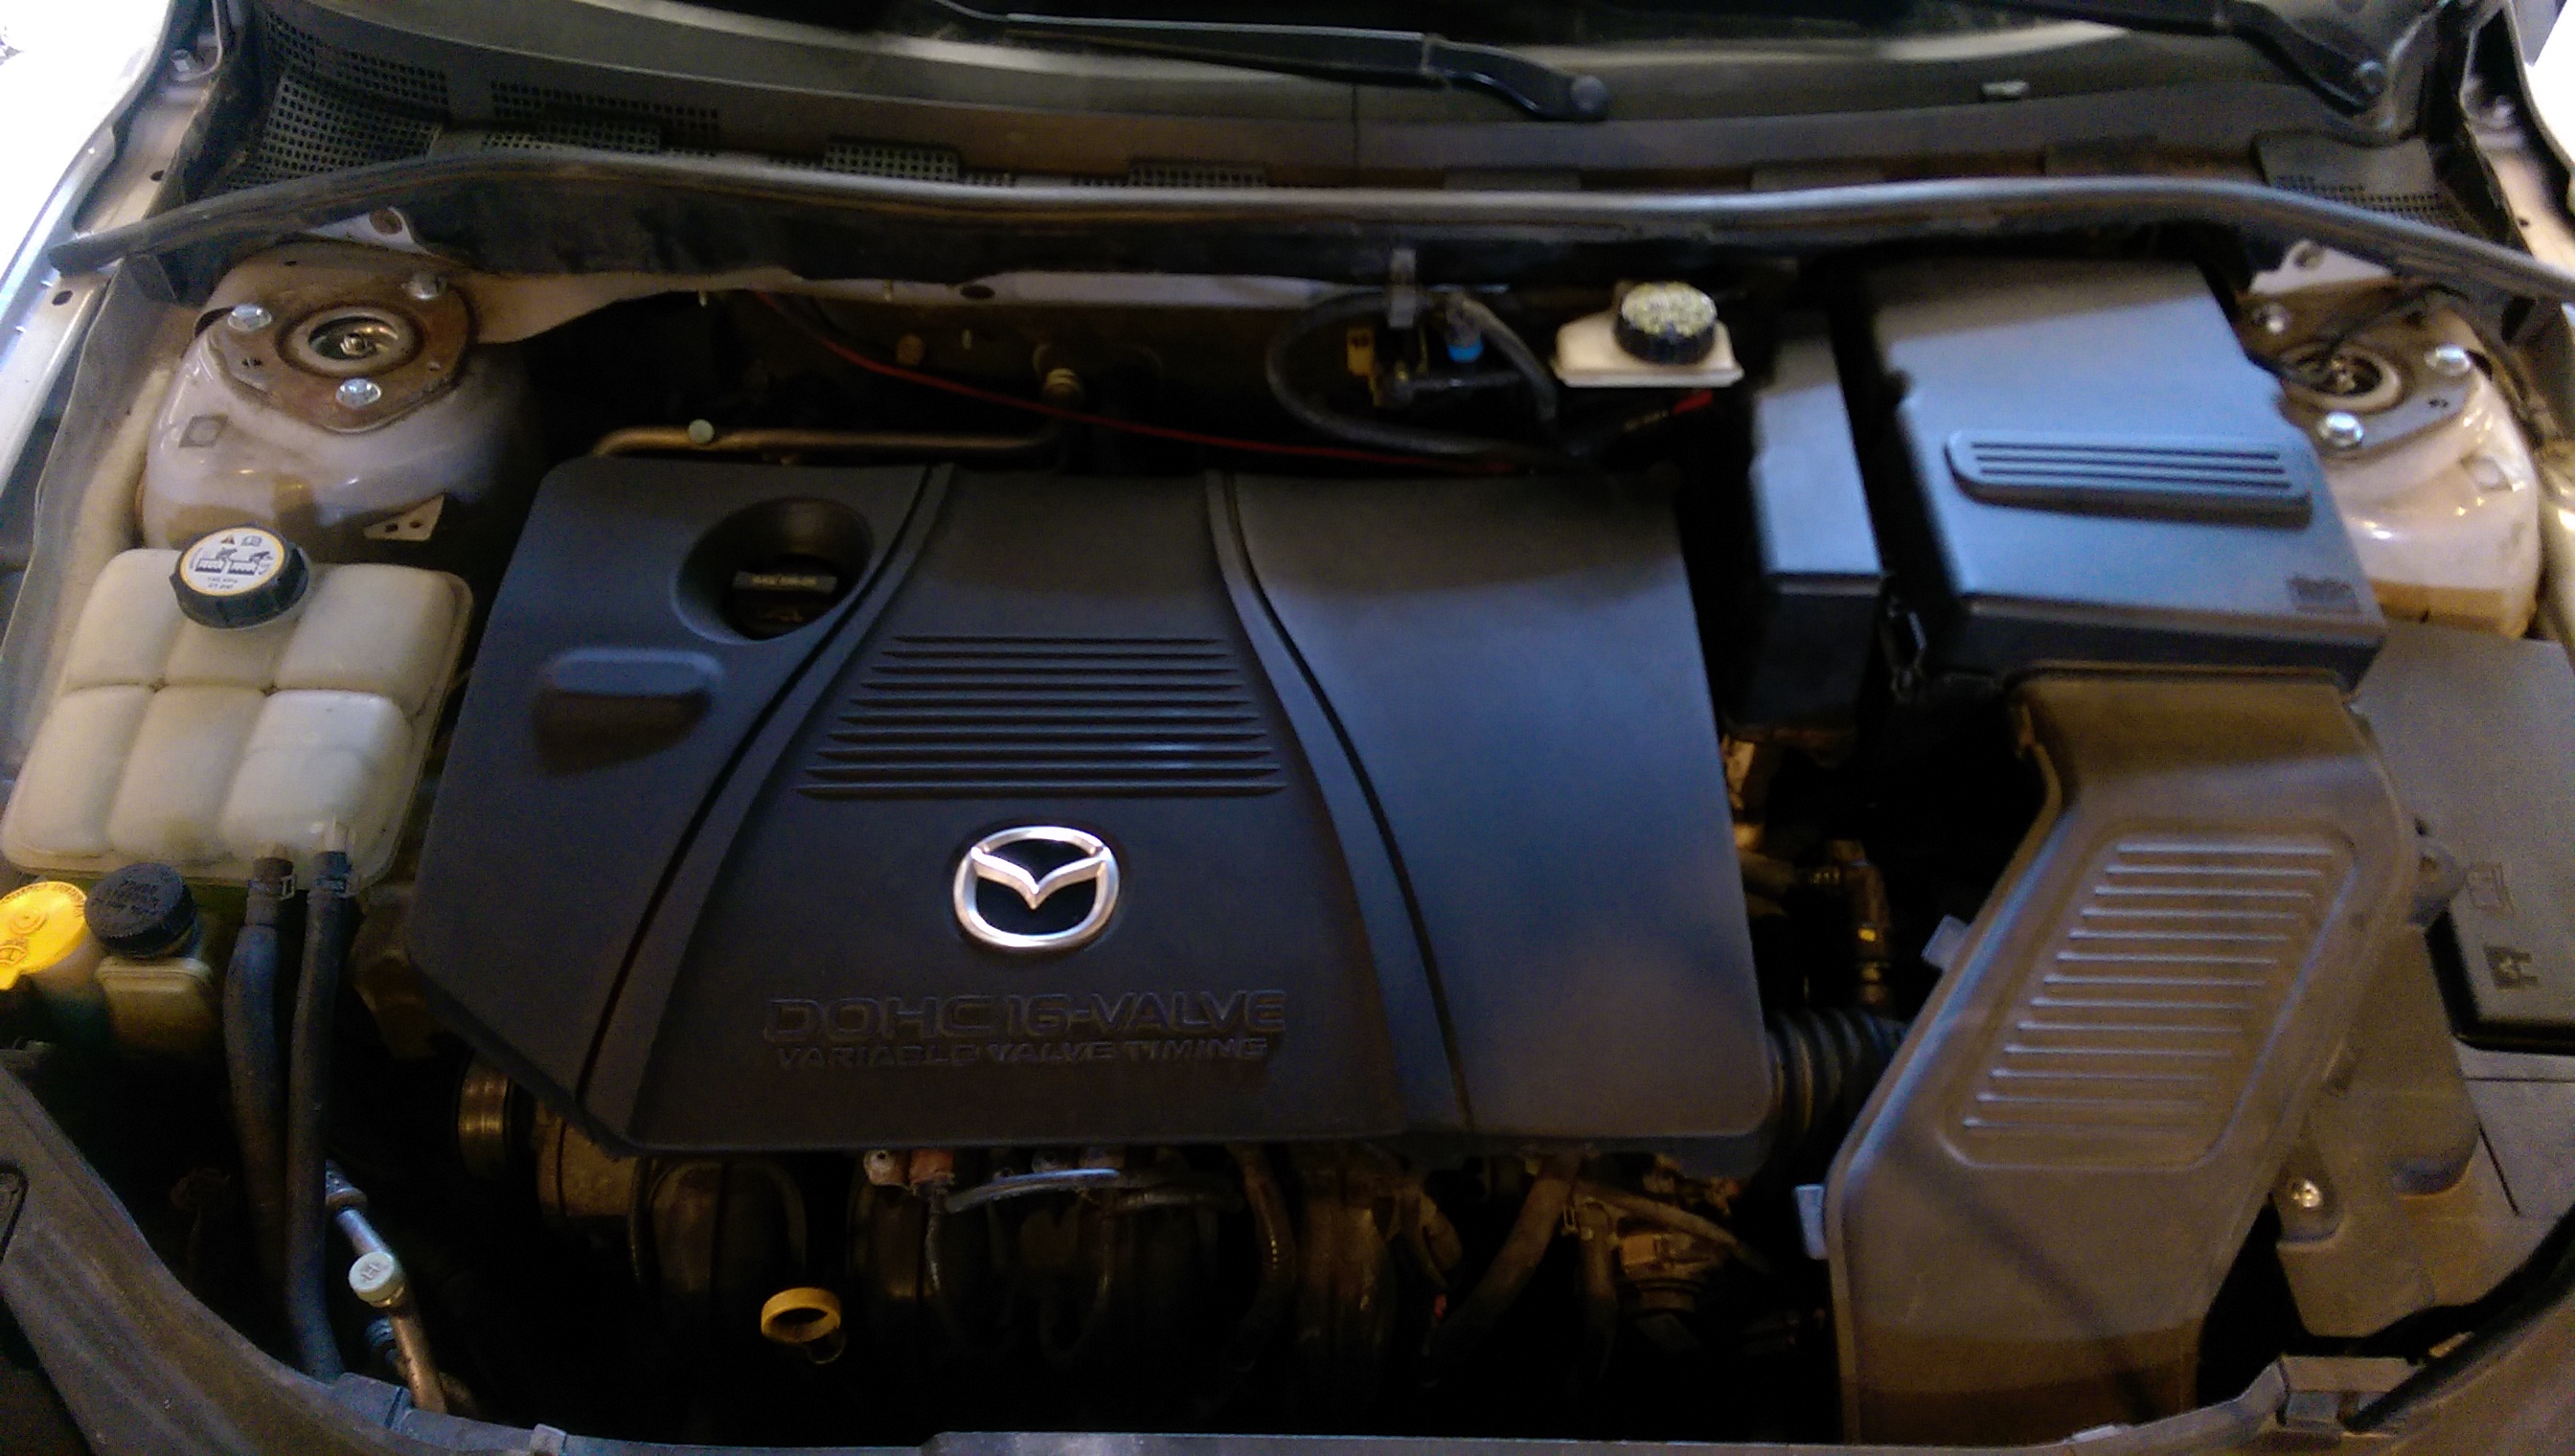
The transmission mount sits under the battery tray on the early Mazda3. I’m not sure how anything 2010+ is set up but it’s a bit annoying on the first gen cars since you’ve got to take the battery tray apart. Naturally, I started by unhooking the battery (negative first, remember!) and then backing out the three bolts at the bottom of the battery tray. There are, also naturally, a lot of wires running near the battery box so I found it easiest to move all of those out of the way first. This includes unhooking a few larger plugs, be careful with those. The blue one on the drivers side has a small black tab that you need to push towards the rear of the car before prying the plug handle up. The two on the side of the battery box are something of a mystery, I’m not sure how I got those unplugged.


I also decided to change out the engine air filter as I didn’t have any records of it being done. This is pretty easy, there are 4 small clamps on the air box that you simply pry open and then lift the top up. I ended up just removing the whole thing as it gives easier access for the mount removal and also makes it easier to maneuver the battery box.


The filter itself didn’t look too bad, one the top side anyway. I’m glad I changed it.


With all of this stuff out of the way, I was finally able to remove the actual battery box itself. The front side comes off on it’s own which is nice because it allows you to route all the wires that run through it when you put it back together.


Next to go was the air box since I already had the top off and the plate that sites over the transmission mount is super close to the air box, making it near impossible to remove the plate over the mount with the air box in place. Luckily, the air box is nearly as easy to remove as the battery box.
There’s the worm gear style clamp on the intake tube, a rubber hanger towards the front (seen in the first picture below), and some wires that are connected to a plate that runs towards the mid-engine area. The wires can be a bit tricky as there isn’t much room to work and you’ve got to squeeze the push connector together to back it out of the plate. Or just yank it out, not that I did that. Once you’ve got that figured out you have to twist your arm behind your back and do some blood magic, then it easily lifts out. Simple!


Now you can actually see the part you wanted to swap out. Here’s my suggestion: don’t. Unless you really need to. There’s a single bolt through the center, back that out and lift. You’re half way done. Yes, only half.


Go ahead and start piecing it back together. Don’t do what I did and put the nuts back on before putting the lower intake + mount plate on first. It’s embarrassing.


I didn’t take any pictures of this going back together, but from the time I removed the first connectors to the time I was done swearing was probably an hour or so. Really not bad all things considered, but it certainly could be easier.

This all happened on a Saturday, we were leaving the following Thursday and I still had a control arm and half shaft to replace along with a bad need for an alignment. I got it done, but it was a close thing. Our next trip, starting this coming week, won’t be nearly as pressed for maintenance. So how did the control arm and half shaft go? Easy, too easy, because I’ve replaced them before.
I started by removing the half shaft lock bolt, then unbolting the ball joint from the knuckle. The ball joint was destroyed so it wasn’t having any of that “just pry it out of the knuckle” stuff. We ended up using a larger piece of steel bar that we could hold on the lower control arm near the ball joint, and then smashed it with a mallet until it came apart.

It worked! All I had to do then was remove the two bolts on the rear of the control arm and the single bolt through the front bushing of the control arm, pulls right off then. With the control arm off it’s pretty easy to remove and replace the half shaft and lose minimal transmission fluid. I was able to swap it around super quick as this is my 5th or 6th time doing it. I picked this half-shaft up at O’Rielly’s as the price was right and they offer a lifetime warranty. At the rate I replace these, they’re in trouble.


I used the lock bolt to make sure the threads of the shaft and the knuckle were matched up and to hold it in place while I replaced the control arm with the shiny new piece. The ball joint was pressed back into the knuckle using the floor jack, and then secured with the 14mm bolt in the knuckle. I used some Loctite on the lock bolt when it was time to put it in place for real. I just checked it tonight, about two weeks later, still at 80lb/ft.


I finished this all off with an oil and filter change. This whole process took a whole hour and a half on a work night, and the next day I took it in for an alignment. It’s pretty awesome to go from “maybe I should actually slow down for this corner” to “holy crap that feels better, that ball joint really was gone” and then to “whoa, this thing can carry speed through the corners now!” after the ball joint replacement and alignment. Seriously, I had to look like an idiot to anyone driving past with the grin I was wearing.
We made it up to the Twin Cities in good time. Remember that rear wheel liner that had questionable mounting credibility after I knocked most of the rust off? It decided it was done and wanted to do it’s own thing, I saw it depart in the mirror and was happy to discover that is wasn’t anything important when I stopped shortly thereafter. The trip down wasn’t too bad either; I discovered that the Mazda gets 28ish MPG at 80mph as we filled up before jumping on the highway and then immediately after arriving in Portage. Not bad! Unfortunately, we did have someone kick up a rock that managed a decent sized chip in the windshield. It’s sort of fixed now, I’ll throw that in the next update since I just finished working on that chip today.
That’s it for this update, as I mentioned above I’ve got some other work done since then. I’ve also been diverting some time to a project that needs a little love. More on that soonish.
